In this post, I demonstrate how to use System Center Configuration Manager to evaluate clients for STIG compliance.
The process at a high level is:
-
-
- Download the corresponding STIG compliance SCAP files.
- Convert the downloaded files into a CAB file for import.
- Import the CAB file into Configmgr
- Deploy the Configuration Baseline to the corresponding device collection
- Evaluate the compliance reporting from the clients
- Export the compliance data to SCAP format
-
Important information
For SCAP 1.0 – 1.2, If you don’t specify the benchmark/profile, then scaptodcm.exe will generate a DCM cab for each benchmark in the content file. Fun.
If you specify multiple values for a single variable in an external variable file, then the scaptodcm.exe tool will treat the values as an array.
The settings you may see in the screenshots are NOT worthy of a production site, my clients and site servers have very aggressive schedules because I don’t have the same concerns when running in production. DO NOT use my schedule settings.
Don’t confuse the two executables: scaptodcm.exe and dcmtoscap.exe, they both have different jobs.
When converting the compliance data to a results file, if the clients evaluated multiple datastream \ benchmark \ profiles use the -select parameter to specify the same datastream \ benchmark \ profile which was run on the client.
SCAP 3.0 extensions must be installed on your Configmgr server.
At the bottom you find two tables, one that defines the command line parameters and the other lists the relevant log files if you need to troubleshoot.
Download the appropriate SCAP files
1. Download the SCAP content from: http://iase.disa.mil/stigs/scap/Pages/index.aspx

2. Extract the ZIP file to a folder for conversion. I just created a subfolder under the directory where scaptodcm.exe lives to keep things simple. You should choose the location that makes sense to you.

![]() In this example, we will import the Windows 2012 and 2012 R2 MS STIG Benchmark – Ver 2, Rel.6
In this example, we will import the Windows 2012 and 2012 R2 MS STIG Benchmark – Ver 2, Rel.6
3. After extracting the zip file, from a command prompt with administrative permissions run the appropriate command line to convert the SCAP data stream file and XDCCF benchmark profile to a DCM .CAB file, assuming you are also using a SCAP 1.0 or 1.1 file.
In this example the file is SCAP 1.1 so the parameter -xccdf is required.
![]()
Below is an example command line of each type of content, 1.0/1.1, 1.2, and Oval. See my note above regarding the -select parameter.
SCAP 1.0/1.1 Content: scaptodcm.exe –xccdf scap_gov.nist_Test-Win10_xccdf.xml –cpe scap_gov.nist_Test-Win10_cpe.xml –out <folder> –select XCCDFBenchmarkID \ ProfileID
SCAP 1.2 Content: scaptodcm.exe –scap scap_gov.nist_USTCB-ie11.xml –out <folder> –select SCAPDataStreamID \ BenchMarkID \ ProfileID
SCAP OVAL Content: scaptodcm.exe –oval OvalFile.xml –variable OvalExternalVariableFile.xml –out <folder>
The conversion process may take a minute or more depending on the XML file.
![Administrator: usage for SCAP 1.2: ScapToDcm. exe -scap ScapDataStreamFi1e [ -out OutputDirectory] [-select ScapDataStreamID/XccdfBenchma rkID/XccdfProfi1eID] [ -log LogFi1eName] [ -batch 588] Usage for SCAP 1.1/1. ø: ScapToDcm.exe -xccdf XccdfFi1e -cpe CPEFi1e [ -out OutputDirectory] [-select XccdfBenchmarkID/Xcc dfProfi1eID] [ -log LogFi1eName] [ -batch 588] Usage for OVAL: ScapToDcm.exe -oval OvalFi1e [ -variable OvalExterna1Variab1eFi1e] [ -out OutputDirectory] [ -log LogFi1eNa e] [ -batch 588] H: \Program Files (x86)\SCAP Extensions>scaptodcm.exe -xccdf . \ 2812\U R2 MS V2R6_STIG SCAP_1-1_Benc hmark-xccdf .xml -cpe . R2 MS V2R6_STIG_SCAP_1-1_Benchmark-cpe-dictionary.xm1 -out . \ 2812 Try to create log file: H: \Program Files (x86)\SCAP Extensions\ScapToDcm. log alidate the schema of XCCDF file H: \Program Files (x86)\SCAP MS V2R6 STIG SC P 1-1 Benchmark-xccdf .xml Successfully validate the schema of XCCDF file H: \Program Files (x86)\SCAP R2 MS V2R6 STIG SCAP 1-1 Benchmark-xccdf .xml Process XCCDF benchmark in file H: \Program Files Windows _ 2812 _ and _ 2812 R2 ms V2R6 STIG SCA? 1-1 Benchmark-xccdf .xml Process Process Process Process Process Process Process Process Process Process Process Process XCCDF XCCDF XCCDF XCCDF XCCDF XCCDF XCCDF XCCDF XCCDF XCCDF XCCDF XCCDF Benchmark Windows 2812 ms STIG Profile: Profile: Profile: Profile: Profile: Profile: Profile: Profile: Profile: Profile: Profile: MAC MAC- 1 MAC- 1 MAC- 2 MAC- 2 MAC- 2 MAC- 3 MAC- 3 MAC- 3 Classified-l - mission Critical Classified Public- I - mission Critical Public Sensitive- I - mission Critical Sensitive Classified-ll - mission Support Classified Public- II - mission Support Public Sensitive- II - mission Support Sensitive Classified-lll - Administrative Classified Public- III - Administrative Public Sensitive- III - Administrative Sensitive Disable Slow Rules-Disab1e Slow Rules 1 only Load file H: \Program Files Windows _ 2812 _ and _ 2812 R2 ms V2R6 STIG 1 for check content U Windows 2812 and 2812 R2 MS V2R6 STIG SCAP 1-1 Benchmark-oval .xml Process OVAL definitions in file H: \Program Files (x86)\SCAP R2 MS V2R6 STIG SC P 1-1 Benchmark-oval .xml Process OVAL: U Windows 2812 and 2812 R2 ms V2R6 STIG SCA? 1-1 Benchmark-oval .xml Successfully finished process OVAL: U R2 MS V2R6_STIG_SCAP_1-1_Benchmark-ova1 .xml Process CPE dictionary in file H: \Program Files (x86)\SCAP R2 MS V2R6 STIG SCAP 1 -1_Benchmark- cpe- dictionary . xml Load file H: \Program Files (x86)\SCAP R2 MS V2R6_STIG_SCAP_1-1_Benchmark-cpe-ova l.xml for check content R2 MS V2R6_STIG_SCAP_1-1_Benchmark-cpe-ova1 .xml Process OVAL definitions in file H: \Program Files (x86)\SCAP R2 MS V2R6 STIG SC P_l -1_Benchmark- cpe-oval . xml Process OVAL: U Windows _ 2812 _ and _ 2812 R2 ms .xml Successfully finished process OVAL: U R2 MS V2R6 STIG SCAP_1-1_Benchmark-cpe-ova1 .xml CCDF Benchmark: [Windows _ 2812 ms STIG] Version : update: Timestamp : Status: Status date: Title: Description : [2] [1/1/8881] [accepted] [18/28/2816] [Windows Server 2812 / 2812 R2 member Server Security Technical Implementation Guide] [The Windows Server 2812 / 2812 R2 member Server Security Technical Implementation Guide (STIG) is publ ished as a tool to improve the security of Department of Defense (DoD) information systems. Comments or proposed revisio ns to this document should be sent via e-mail to the following address: . mil.] XCCDF Profile: XCCDF Profile: XCCDF Profile: [MAC-1 Classified] [MAC-l_public] fmAC-1 Sensitive I](https://anthonyonazure.com/wp-content/uploads/2016/12/clip_image005-1.png)
Once the conversion is completed the CAB file should be located in the directory specified in the command line with the -out parameter.
![]()
Next is to import the file in Configmgr for deployment, evaluation, and compliance reporting.
Import the Compliance Settings CAB files Configmgr
The next step in the process is to use the Configuration Manager Console to import the Compliance Settings-compliant .cab files into Configuration Manager. When you import the .cab files you created earlier in this process, one or more configuration items and configuration baselines are created in the Configuration Manager database. Later in the process, you can assign each of the configuration baselines to a computer collection in Configuration Manager.
To import the Compliance Settings CAB files into Configmgr
1. In the Configuration Manager Console, navigate to Assets and Compliance > Compliance Settings > Configuration Baselines.
2. In the menu bar, click the blue arrow Import Configuration Data.
3. To begin the import process click the Add button.
4. Browse to the directory that we specified earlier with the scaptodcm.exe tool -out <path\file>, and select the CAB file that was created.
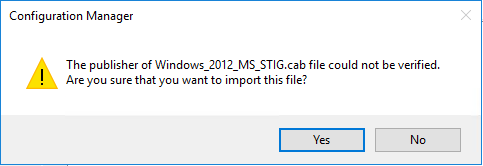
Click Yes in the Configuration Manager Security Warning dialog box.
You should now see the CAB file listed in the Select Files page similar to this.

You could add more than one CAB file here, if you created or had multiple CAB files to import simply repeat the steps 3 and 4.
5. Click the Next button.
This will start the verification process for the import, this can take several minutes and depends on the number of Configuration Items being imported.

6. Once the verification is finished you will be at the Summary page which will list all the Configuration Items being imported.
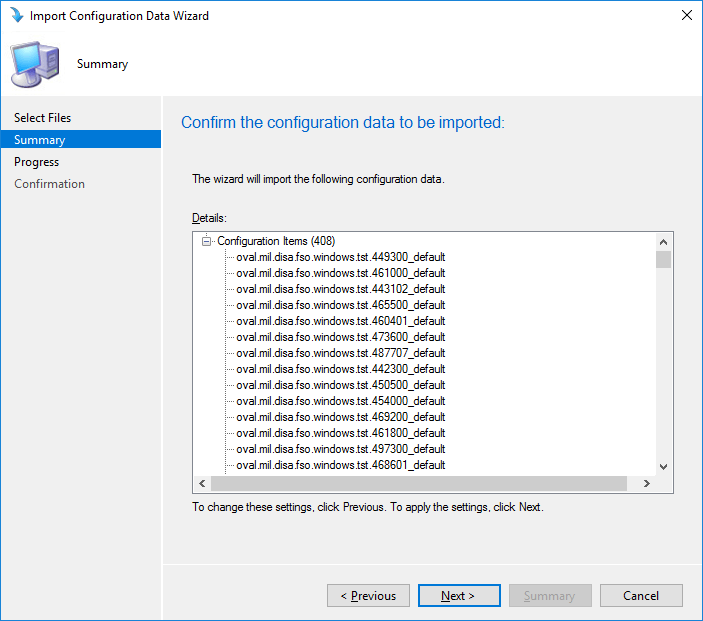
7. Click the Next button and this will start the import into Configmgr. This may also take a few minutes.
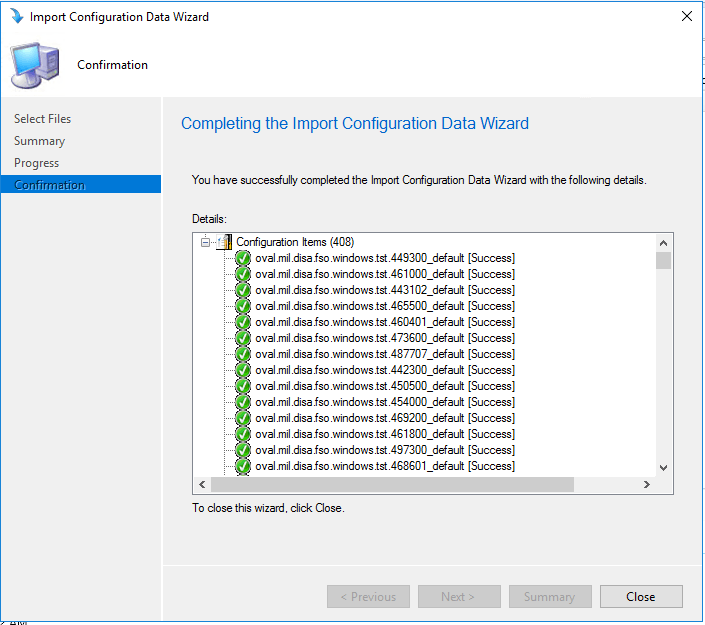
8. Click the close button to exit the import wizard.
The new configuration baseline appears in the information pane of the Configuration Manager Console.

The name of the configuration baseline is taken from the display name section of the XCCDF/Datastream XML and is constructed using the following convention:
ABC[XYZ], where ABC is the XCCDF Benchmark ID, and XYZ is the XCCDF Profile ID (if a profile is selected).
Assign configuration baselines to the computer collections
Prior to assigning the configuration baseline to a collection of computers ensure that you have the appropriate collections created that targets the type of clients you want to assess.
Continuing with the same STIG benchmark as earlier I am going to target my Windows Server 2012 clients and Windows 2012 R2 clients, but excluding my domain controllers since they have a different set of compliance checks.

After creating the appropriate computer collections for the clients that you want to assess for compliance, you are ready to assign the Configuration Baselines that you imported.
Here is the WQL syntax for my collection, which includes, Server 2012, Server 2012 R2, but excludes my domain controllers.
select SMS_R_SYSTEM.ResourceID,SMS_R_SYSTEM.ResourceType,SMS_R_SYSTEM.Name,SMS_R_SYSTEM.SMSUniqueIdentifier,SMS_R_SYSTEM.ResourceDomainORWorkgroup,SMS_R_SYSTEM.Client from SMS_R_System inner join SMS_G_System_COMPUTER_SYSTEM on SMS_G_System_COMPUTER_SYSTEM.ResourceID = SMS_R_System.ResourceId where SMS_R_System.OperatingSystemNameandVersion like “%Server%” and SMS_R_System.OperatingSystemNameandVersion like “%6.2%” or SMS_R_System.OperatingSystemNameandVersion like “%6.3%” and SMS_G_System_COMPUTER_SYSTEM.DomainRole < 4
The key in this query to exclude domain controllers is the “SMS_G_System_COMPUTER_SYSTEM.DomainRole < 4“
DomainRole 4 = LM_Workstation, LM_Server, SQLServer, Backup_Domain_Controller, Timesource, NT, DFS
DomainRole 5 = LM_Workstation, LM_Server, SQLServer, Primary_Domain_Controller, Timesource, NT, DFS
DomainRole 3 = LM_Workstation, LM_Server, NT, Server_NT
DomainRole 1 = LM_Workstation, LM_Server, SQLServer, NT, Potential_Browser, Backup_Browser
NT indicates a workstation
Server_NT indicates a member server
Notice the PDC and BDC do not have either of these designations however.
SQL_Server, Timesource, DFS are all options and you may not see them in the roles description.
To see the descriptions and their ID number stored in the db you can this query
SELECT TOP (1000) [ResourceID],[Description0],[Domain0],[DomainRole0],[Manufacturer0],[Model0],[Name0],[NumberOfProcessors0],[Roles0],[Status0],[SystemType0],[UserName0]
FROM [CM_MSC].[dbo].[v_GS_COMPUTER_SYSTEM]
Note: Change the MSC to your site code to run the query.
To assign a configuration baseline to a computer collection
1. In the Configuration Manager Console, go to Assets and Compliance > Compliance Settings > Configuration Baselines.
2. In the navigation pane, click <configuration_baseline>, where <configuration_baseline> is the name of the configuration baseline that you want to assign to a computer collection.

3. In the menu bar, click the green arrow Deploy. (Notice a theme?)
4. In the Deploy Configuration Baseline Dialog click the Browse button and select the collection you want to target.
![Deploy Configuration Baselines Select the configuration baselines that you want to deploy to a collection Available configuration baselines Fittar„ WS2012R2 Member Server Security Comp A Copy of Offce2013 Computer Security WS2012R2 Domain Security Compliance v Z] Remediate noncompliant rules when supported Add > < Remove Z] Allow remediation outside the maintenance window Z] Generate an alert When compliance is below Data and time Z] Generate System Center Operations Manager alert Select the collection for this configuration baseline deployment S RV Al Wndows Servers Specify the compliance evaluation schedule for this configuration baseline @ Simple schedule Run every C) Custom schedule No custom schedule defined Selected configuration baselines Fittar„ Windows Server 2012 / 2012 R2 Member Customiza„](https://anthonyonazure.com/wp-content/uploads/2016/12/clip_image014-1.png)
DO NOT select Remediation, this particular Baseline of Configuration Items does not contain any remediation, which will cause problems with your baseline if you select remediation.
FYI: Both the Configuration Baseline, and the Configuration Items it contains, must be configured for remediation for remediation to work.
You will need to use your discretion on the alerts, and the schedule. I have mine set to 4 hours – but mine is a lab. The default client settings is every 7 days.
FYI: If you have multiple baselines deployed (or just one) you can use Send Schedule tool in the Configmgr Toolkit to view a clients scheduled time to run evaluations. You can also use it to trigger the evaluation.
If you are going to target multiple collections you will need to repeat this process. If however you wanted to deploy multiple Configuration Baselines to the same collection you could select and add them without having to repeat this process.
Verify that the compliance data has been collected
Before exporting the compliance data back to SCAP format, we need to verify that the data has been collected. After you assign a Configuration Baseline to a computer collection, the client on each computer in that collection evaluates its settings and automatically gathers the compliance information. The client will then deliver that information to its management point, then the MP will deliver the information to the primary site where the client is assigned. Finally, the compliance information is stored in the Configuration Manager database.
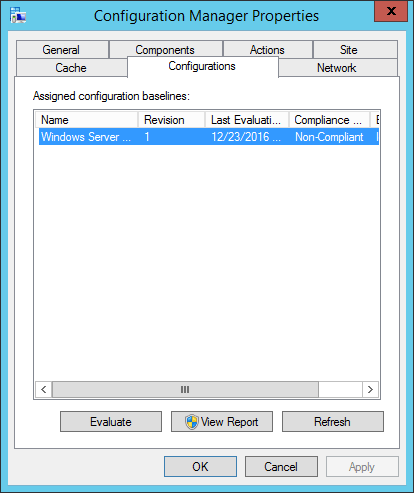
From the client side you can see if the baseline has been downloaded by the client by viewing the Configurations tab in the Configmgr client properties.
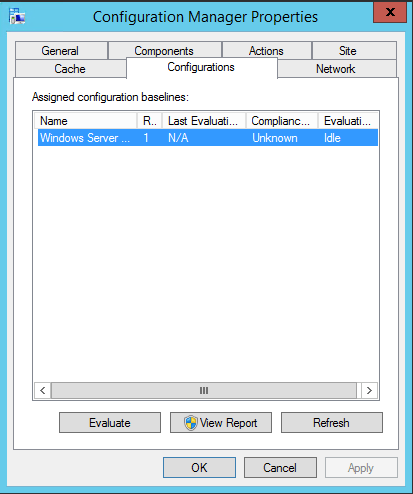
It will also indicate if the baseline has run, and what the results were, if you select the View Report you will get a report that shows pass / fail for each CI. You can see this client has run the baseline and is non-compliant.
Verify that the compliance data has been collected
There are a couple options in the Configmgr console to check and see if the data has been loaded into the database yet. Under the Monitoring tab > Deployments you can see the compliance percentage.

You can also view the count of compliant and non-compliant clients, as well as failures under Assets and Compliance > Compliance Settings > Configuration Baselines.

Both of these are still at zero…and it has been a while since the client completed its evaluation. I list the relevant log files below for troubleshooting but we don’t need those. If you are viewing the baseline in the console by selecting the Configuration Baselines node, look to the left of the green Deploy arrow we used earlier in the menu bar. The summarization has not run yet. You can see the schedule using the Schedule Summarization button (default is 2 hours), and even force it to run now by clicking the Run Summarization button.

I forced mine to run and now I have the non-compliant results from my client showing in the console.
![]()
Export compliance results to SCAP
The next task in the process is to export the Compliance Settings compliance data to SCAP format, which is an ARF report file in XML \ human-readable format.
Exporting the compliance data to an XCCDF \ DataStream ARF results file
1. On your Configmgr server where you installed the SCAP extensions, click Start > All Programs > SCAP Extensions > SCAP Extensions. Or you can open a command prompt and navigate to the folder.
2. At the command prompt, enter the correct command line and press ENTER.
Note: The exe is dcmtoscap.exe not scaptodcm.exe like we used when creating the CAB file.
FYI: If it helps to make sense of the naming of the file, in Configmgr 2007 Configuration Baselines and Configuration Items were part of the Desired Configuration Management feature, or DCM. Trust me, I wrote the chapter on it in the 2007 R2 book.

Here is my command line if you want to copy-n-pate it.
dcmtoscap.exe -xccdf .\2012\U_Windows_2012_and_2012_R2_MS_V2R6_STIG_SCAP_1-1_Benchmark-xccdf.xml -cpe .\2012\U_Windows_2012_and_2012_R2_MS_V2R6_STIG_SCAP_1-1_Benchmark-cpe-dictionary.xml -server cm-cb.corp.configmgr.com -database CM_MSC -collection MSC00014 -out .\output
Below are the command line parameters for each type.
For SCAP 1.0/1.1 content
dcmtoscap.exe –xccdf <xccdf.xml> –cpe <cpe.xml> –server <CMSiteServerMachineName> –database <CMSiteDatebaseName> –collection <deviceCollectionID> OR -machine <host name> -select <xccdfBenchmark \ profile> -out <outputResultFolder>
For SCAP 1.2 content (such as the latest USGCB content):
dcmtoscap.exe –scap <scapdatastreamfile.xml> –server <CMSiteServerMachineName> –database <CMSiteDatebaseName> –collection <deviceCollectionID> OR -machine <host name> -select <datastream \ xccdfBenchmark \ profile> -out <outputResultFolder>
For single OVAL file with external variables
dcmtoscap.exe –oval <singleOvalFile.xml> [-variable <externalVariableFile.xml>] –server <CMSiteServerMachineName> –database <CMSiteDatebaseName> –collection <deviceCollectionID> -out <outputResultFolder>
And if all goes well you should end up with something like this for your output.
![Machine generated alternative text: U Windows 2012 and 2012 R2 MS V2R6 STIG SCAP 1-1 U Windows 2012 and 2012 R2 MS V2R6 STIG SCAP 1-1 U Windows 2012 and 2012 R2 MS V2R6 STIG SCAP 1-1 Z] Windows 2012 MS STIG 16777221 ORC2012R2.txt Windows 2012 MS STIG 16777221 ORC2012R2xmI Benchmark-cpe-oval.xml-default 16777221 ORC2012R2.xmI Benchmark-ovalxml-default 16777221 ORC2012R2xml Benchmark-oval.xml-notapplicable 16777221 ORC2012R2.xmI 12/23/2016 2:53 AM 12/23/2016 2:53 AM 12/23/2016 2:53 AM 12/23/2016 2:53 AM 12/23/2016 AM XML Document XML Document XML Document Text Document XML Document 277 G 281 G 206 KB](https://anthonyonazure.com/wp-content/uploads/2016/12/clip_image022.png)
And then we are done.
Next will be how to use the Baseline Configurations and check for compliance against VM’s running in Azure. Then, I will conclude with custom remediation when clients fail evaluation.
Command line parameters for SCAP extensions
| Parameter | Usage | Required | |
|
–server [SQLServer\SQLInstance] |
Specify the name of Configmgr site database server and the SQL instance. |
Yes |
|
|
–database [SQLDatabase] |
Specify the name of the Configuration Manager site database. |
Yes | |
|
–collection [collection id] |
Specify the collection id to generate the SCAP report. |
Yes (when -machine is not specified) |
|
|
–machine [machine name] |
Specify the computer name to generate the SCAP report. |
Yes (when -collection is not specified) |
|
|
-organization [organization name] |
Specify the organization name, which would be displayed in report. It can be separated by ‘;’ to specify a multi-line organization name. |
No |
|
|
-type [thin / full / fullnosc] |
Specify the OVAL result type: thin result or full result or full result without system characteristic. |
No (if not specified, then the default value is full) |
|
|
–cpe |
Specify the cpe-dictionary file |
Yes (for SCAP 1.0 \ 1.1) |
|
|
–scap [scap data stream file] |
Specify the SCAP data stream file. |
Yes (for SCAP 1.2 data stream, mutually exclusive with -xccdf and -oval \ -variable) |
|
|
–xccdf [xccdf file] |
Specify the XCCDF file. |
Yes (for SCAP 1.0 \ 1.1 XCCDF, mutually exclusive with -scap and -oval \ -variable) |
|
|
–oval [oval file] |
Specify the OVAL file. |
Yes (for standalone OVAL file, mutually exclusive with -xccdf and -scap |
|
|
-variable [oval external variable file] |
Specify the OVAL external variable file. |
No (optional for standalone OVAL file when there is an external OVAL variable file, mutually exclusive with -xccdf and -scap) |
|
|
–select [xccdf benchmark \ profile] |
Select XCCDF benchmark, profile from either the SCAP data stream or XCCDF file. |
Yes (for SCAP 1.0 \ 1.1 and 1.2. A selection must be made to generate a report to match the corresponding DCM baseline in Configuration Manager database) |
|
|
-out [output directory] |
Specify where to output the Compliance Settings cab file. |
No (if not specified, then the output only lists the content without conversion) |
|
|
-log [log file] |
Specify the log file. |
No (if not specified, then the log is written to SCAPToDCM.log \ DCMtoSCAP.log file) |
|
|
-help / -? |
Print out tool usage. |
No |
Log Files
These are the relevant log files for troubleshooting the deployment and evaluation of Configuration Baselines
| Log name | Description |
| CIAgent.log | Records details about the process of remediation and compliance for compliance settings, software updates, and application management. |
| CIDownloader.log | Records details about configuration item definition downloads |
| CITaskManager.log | Records information about configuration item task scheduling. |
| DCMAgent.log | Records high-level information about the evaluation, conflict reporting, and remediation of configuration items and applications. |
| DCMReporting.log | Records information about reporting policy platform results into state messages for configuration items. |
| DcmWmiProvider.log | Records information about reading configuration item sync lets from Windows Management Instrumentation (WMI). |
| PolicyAgent.log | Records requests for policies made by using the Data Transfer service. |
| Scheduler.log | Records activities of scheduled tasks for all client operations. |
| StatusAgent.log | Records status messages that are created by the client components. |
| DataTransferService.log | Records all BITS communication for policy or package access. |
| PolicyEvaluator.log | Records details about the evaluation of policies on client computers, including policies from software updates. |