
Azure DevOps is a collection of development tools, services, and features that enable teams to plan, develop, deliver, and maintain software more efficiently. It provides version control, work tracking, and agile tools for planning and tracking work, as well as tools for testing and releasing software.
To set up Azure DevOps, you will need to follow these steps:
-
Sign up for an Azure DevOps account: (duh 😁) Go to the Azure DevOps website and click on “Start free” or “Start free with GitHub”. Follow the prompts to create a new account.
-
Create an organization: After you have signed up for an Azure DevOps account, you will need to create an organization. An organization is a group of related projects, and it helps to keep your work organized and isolated from other projects. To create an organization, click on the “Create an organization” button on the dashboard, and follow the prompts to enter the name and location of your organization.
-
Create a project: After you have created an organization, you will need to create a project within it. A project is a container for all the work that you do in Azure DevOps. To create a project, click on the “New Project” button on the dashboard, and follow the prompts to enter the name and description of your project.
-
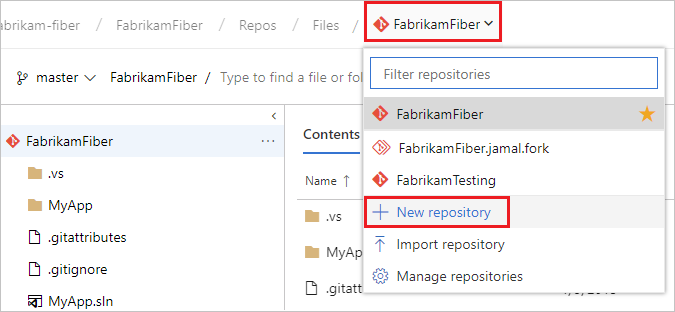
Set up Git for version control: Azure DevOps provides support for Git, the global standard for version control. Select version control or Git to learn more if you are new to either. You will need to have Git installed locally, if you need help click here. Next you will need to setup your Git repository. You have two options to create a Git repo. You can create one from the code in a folder on a computer, or clone one from an existing repo. If you are creating a new repository in Azure Devops select “Repo” from the left menu and then “Files”, from the top menu bar select the drop-down menu and then “+ New repository” as seen in this image.
 If the code is in another Git repo, such as a GitHub repo or a different Azure Repo instance, import it into a new or existing empty Git repo, if the code is on your local computer and not yet in version control, either create a new Git repo in your project or add your code to an existing repository. You can also do this through Visual Studio instead of through the web but I am going to assume you already know how to setup a repro if you are using VS.
 -
Invite team members: To collaborate on your project, you will need to invite other team members to join your organization and project. To do this, click on the “Organization Settings” cog in the dashboard, it’s in the lower left-hand corner, and then click on the “Users” tab. From here, you can invite new users to join your organization and assign them to specific projects.
-
Set up work tracking: Azure DevOps provides tools for tracking and managing work, including work items, Kanban boards, and agile tools. To set up work tracking for your project, click on the “Boards” tab in the project dashboard, and then click on “Boards” below it on the left and finally on the ‘board’ click “New item” button. Follow the prompts to choose a work tracking process and set up a Kanban board or agile tools for your project. You could also add new work items by going to “Boards” and then “Work items”. If you created an item on the board it will also be listed in Work items.
If you select your new item, you can also add more details to the item. -
Set up a build pipeline: A build pipeline is a set of automated steps that are used to build, test, and deploy your code. Azure DevOps provides a powerful build system that can be used to automate your build and deployment process. To set up a build pipeline, click on the “Pipelines” tab in the project dashboard, and then click on the “New Pipeline” button and follow the prompts.
-
Set up a release pipeline: A release pipeline is a set of automated steps that are used to deploy your code to a production environment. Azure DevOps provides a release management system that can be used to automate the deployment process. To set up a release pipeline, click on the “Releases” tab under “Pipelines”, and then click on the “New Pipeline” button. Follow the prompts to choose a build pipeline and configure your release pipeline.
-
Set up testing tools: Azure DevOps provides tools for testing your code, including manual testing, automated testing, and load testing. Test plans are not free; however you can get a free 30-day trial. And because the setup and running of test plans is rather extensive, I won’t get into the details of setting them up and using them here, instead see this article on Azure DevOps website for more details on what test plans are and this article on creating test plans in Azure DevOps.
 If the code is in another Git repo, such as a GitHub repo or a different Azure Repo instance,
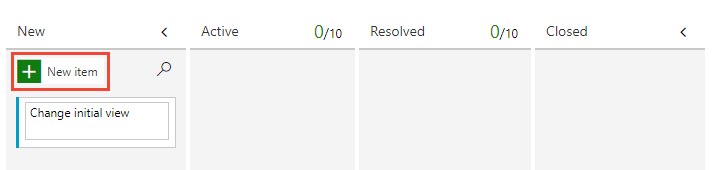
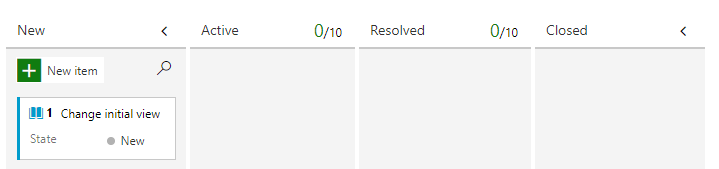 If you select your new item, you can also